In the ever-evolving world of beauty and fashion, nail art has emerged as a dynamic and expressive form of self-expression. Among the various styles and techniques, 3D nail art has carved out a niche for itself, captivating enthusiasts and professionals alike with its intricate designs and textural depth. This article delves into the fascinating world of 3D nail art, exploring its history, popular trends, techniques, tools, and tips for creating stunning designs.

Table of Contents
A Brief History of 3D Nail Art

3D nail art originated in Japan in the 1980s, where the beauty industry has long been known for its innovation and creativity. Japanese nail artists began experimenting with acrylic and gel materials to create raised, textured designs on nails. These early creations often featured flowers, bows, and other decorative elements, setting the stage for the elaborate 3D designs we see today.
As the trend gained popularity, it spread to other parts of the world, particularly the United States and Europe, where nail salons and artists began adopting and adapting the techniques. Today, 3D nail art is a global phenomenon, embraced by celebrities, influencers, and beauty enthusiasts for its ability to turn nails into miniature works of art.
Popular Trends in 3D Nail Art
The versatility of 3D nail art allows for endless creativity and experimentation. Here are some of the most popular trends currently dominating the scene:
1. Floral Designs

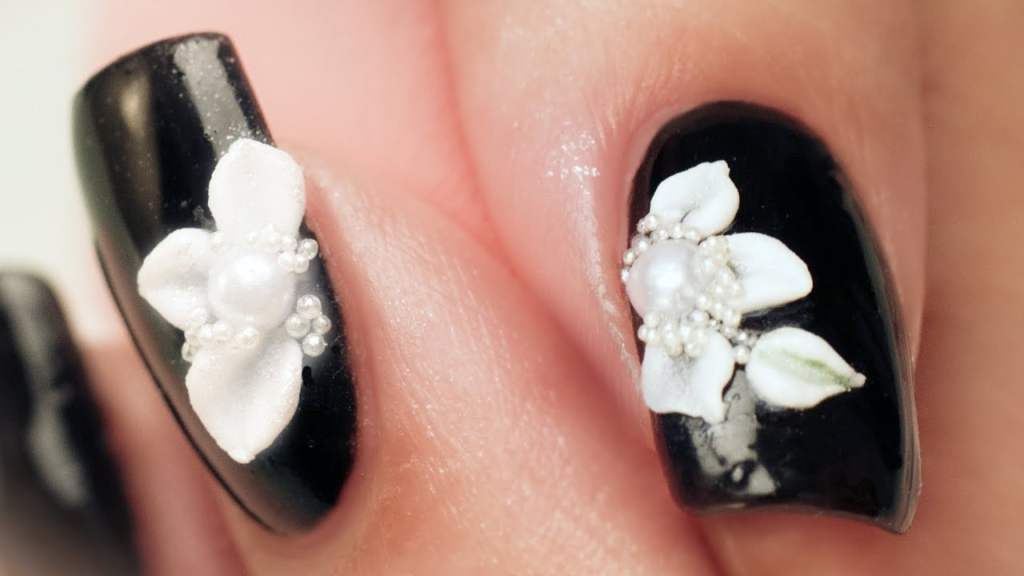
Floral motifs have always been a favorite in nail art, and 3D designs take this trend to new heights. Using acrylic or gel, artists create lifelike flowers that seem to bloom right on the nails. Roses, daisies, and cherry blossoms are particularly popular, often embellished with rhinestones or pearls for added elegance.
2. Geometric Patterns

Geometric shapes and patterns offer a modern, edgy look for those seeking something different. Artists use acrylics to create raised triangles, squares, and other shapes, often combining them with metallic accents or contrasting colors to make a bold statement.
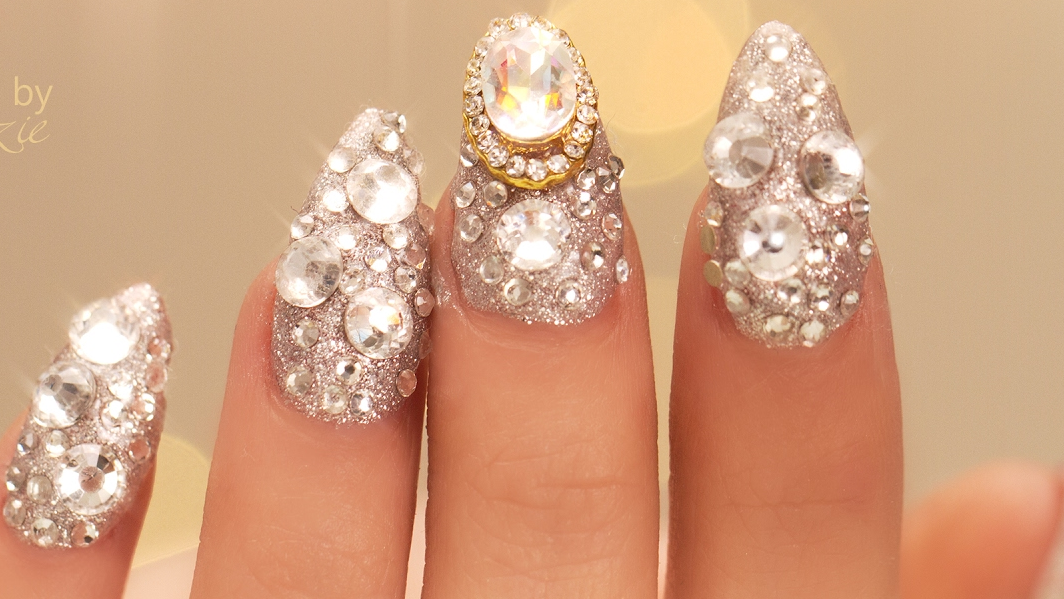
3. Crystal and Gemstone Embellishments

Adding crystals, gemstones, and other embellishments to nails creates a luxurious and glamorous effect. These designs often feature intricate arrangements of rhinestones, pearls, and other decorative elements, creating a sparkling, eye-catching look.
4. Character and Theme-Based Designs

For those who love to make a statement, 3D nail art can feature characters, animals, and themed designs. Popular choices include cartoon characters, animals, and seasonal themes like Halloween or Christmas. These designs often require a high level of skill and creativity to execute.
5. Minimalist 3D Art

Not all 3D nail art has to be extravagant. Minimalist designs use subtle textures and small embellishments to create an understated yet sophisticated look. Simple dots, lines, or single 3D elements can add a touch of elegance without overwhelming the overall design.
Techniques and Tools for Creating 3D Nail Art
Creating 3D nail art requires a variety of techniques and tools. Here’s a breakdown of the essentials:
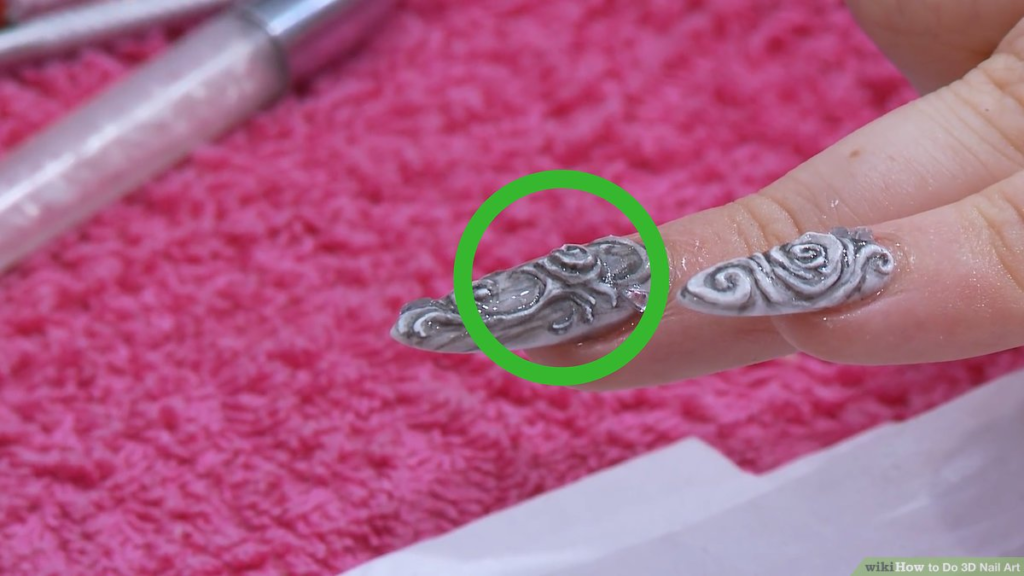
1. Acrylic and Gel Sculpting

Acrylic and gel are the primary materials used in 3D nail art. Acrylics are made from a liquid monomer and a powder polymer that, when combined, form a malleable substance that hardens into a durable structure. Gels, on the other hand, require curing under a UV or LED light to set.
Steps for Acrylic Sculpting:
- Prepare the Nail: Clean and shape the natural nail, then apply a base coat.
- Mix Acrylic: Dip a brush into the liquid monomer, then into the powder polymer to form a small bead.
- Shape the Design: Place the bead on the nail and use the brush to sculpt the desired shape.
- Let It Set: Allow the acrylic to harden completely before adding any additional elements or top coat.
Steps for Gel Sculpting:
- Prepare the Nail: Clean and shape the natural nail, then apply a base coat.
- Apply Gel: Use a brush to apply the gel to the nail in the desired shape.
- Cure the Gel: Place the nail under a UV or LED light to cure the gel.
- Repeat if Necessary: Apply additional layers of gel and cure until the desired design is achieved.
2. Using Nail Art Molds

Nail art molds are a great tool for creating consistent and intricate 3D designs. These silicone molds come in various shapes and sizes, such as flowers, bows, and geometric patterns.
Steps for Using Nail Art Molds:
- Fill the Mold: Apply acrylic or gel into the mold.
- Remove the Design: Once the material has set, carefully remove the design from the mold.
- Attach to Nail: Use a small amount of gel or nail glue to attach the 3D element to the nail.
- Secure and Finish: Cure under a light (if using gel) and apply a top coat to secure the design.
3. Embedding Embellishments
Crystals, rhinestones, pearls, and other embellishments can be embedded into the nail design to create a 3D effect.
Steps for Embedding Embellishments:
- Apply Base Coat: Start with a base coat and cure if using gel.
- Place Embellishments: Apply a small amount of gel or nail glue where the embellishments will go.
- Secure and Cure: Place the embellishments into the gel or glue and cure under a light if using gel.
- Finish with Top Coat: Apply a top coat to secure the embellishments and add shine.
4. Hand-Painting Techniques
Hand-painting is a skill that adds a personal touch to 3D nail art. Artists use fine brushes and special nail art paints to create detailed designs.
Steps for Hand-Painting 3D Designs:
- Base Preparation: Apply a base coat and let it dry.
- Paint the Design: Use fine brushes to paint the design directly onto the nail or onto a 3D element.
- Add Details: Use different colors and techniques to add depth and detail.
- Seal with Top Coat: Finish with a top coat to protect the design.
Tips for Successful 3D Nail Art

Creating stunning 3D nail art requires practice and attention to detail. Here are some tips to help you achieve professional-looking results:
1. Start Simple
If you’re new to 3D nail art, start with simple designs and gradually work your way up to more complex creations. This will help you build your skills and confidence.
2. Use Quality Products
Invest in high-quality acrylics, gels, and embellishments. Quality products are easier to work with and produce better results.
3. Practice Precision
Precision is key in 3D nail art. Use fine brushes and tools to ensure clean lines and accurate placement of elements.
4. Experiment with Colors and Textures
Don’t be afraid to experiment with different colors, textures, and finishes. Combining matte and glossy elements, for example, can add visual interest to your designs.
5. Take Care of Your Tools
Properly clean and store your brushes, molds, and other tools to ensure they last longer and perform well.
6. Stay Inspired
Keep up with the latest trends and techniques by following nail art blogs, social media accounts, and online tutorials. Staying inspired will help you continuously improve and innovate your designs.
Inspirational 3D Nail Art Ideas

To get your creative juices flowing, here are some inspirational 3D nail art ideas:
1. Enchanted Garden
Create a magical garden on your nails with intricate 3D flowers, leaves, and butterflies. Use pastel colors and tiny pearls to add a whimsical touch.
2. Glamorous Night Out
For a glamorous look, cover your nails with black polish and add 3D rhinestones and metallic studs. Create a mix of large and small embellishments for a luxurious, textured effect.
3. Ocean Fantasy
Bring the ocean to your nails with 3D shells, starfish, and waves. Use shades of blue and green, and add a touch of glitter to mimic the sparkle of the sea.
4. Vintage Elegance
Combine vintage elements like lace patterns, pearls, and soft colors for an elegant and timeless design. Use a matte top coat to give the nails a soft, antique finish.
5. Futuristic Geometrics
Experiment with bold geometric shapes and metallic colors for a futuristic look. Use sharp lines and contrasting colors to create a modern, edgy design.
The Future of 3D Nail Art

As technology and creativity continue to evolve, so does the world of 3D nail art. Here are some trends and innovations to watch for in the future:
1. Advanced Materials
New materials, such as bio-gels and environmentally friendly acrylics, are being developed to provide better performance and sustainability.
2. 3D Printing
3D printing technology is making its way into the nail art industry, allowing for the creation of highly intricate and customized designs.
3. Interactive Designs
Nail art is becoming interactive with the use of heat-sensitive polishes, glow-in-the-dark elements, and even tiny LED lights embedded in the nails.
4. Augmented Reality
Augmented reality (AR) apps are being developed to help customers visualize different nail art designs before committing to a particular look, enhancing the nail salon experience.
Conclusion
3D nail art is a captivating and versatile form of self-expression that continues to push the boundaries of creativity and innovation. Whether you’re a seasoned nail artist or a beginner looking to experiment, the world of 3D nail art offers endless possibilities for creating stunning, personalized designs. By mastering the techniques and staying inspired, you can transform your nails into miniature masterpieces that reflect your unique style and personality.
for more information, visit https://happynailsspapalmharbor.com/
FAQ
1. What is 3D nail art?
3D nail art involves creating raised, textured designs on nails using materials like acrylics, gels, and embellishments. These designs can range from simple patterns to intricate, lifelike sculptures.
2. How did 3D nail art originate?
3D nail art originated in Japan in the 1980s. Japanese nail artists began experimenting with acrylics and gels to create raised designs on nails, which later spread to other parts of the world, particularly the United States and Europe.
3. What are some popular trends in 3D nail art?
Popular trends in 3D nail art include:
- Floral designs
- Geometric patterns
- Crystal and gemstone embellishments
- Character and theme-based designs
- Minimalist 3D art
4. What materials are commonly used in 3D nail art?
The primary materials used in 3D nail art are acrylics and gels. Other materials include rhinestones, pearls, crystals, and various embellishments.
5. How do you create 3D designs with acrylics?
Creating 3D designs with acrylics involves:
- Preparing the nail with a base coat.
- Mixing a bead of acrylic using liquid monomer and powder polymer.
- Sculpting the desired shape on the nail with a brush.
- Allowing the acrylic to harden completely before adding additional elements or a top coat.
6. Can beginners create 3D nail art?
Yes, beginners can create 3D nail art by starting with simple designs and gradually advancing to more complex creations. Practicing precision and using quality materials will help improve skills.
7. What tools are essential for 3D nail art?
Essential tools for 3D nail art include fine brushes, nail art molds, UV or LED lights for curing gel, dotting tools, and high-quality acrylic and gel products.
8. How can I incorporate embellishments into my 3D nail art?
To incorporate embellishments:
- Apply a base coat and cure if using gel.
- Apply a small amount of gel or nail glue where the embellishments will go.
- Place the embellishments into the gel or glue and cure under a light if using gel.
- Finish with a top coat to secure the embellishments.
9. Are there any tips for achieving professional-looking 3D nail art?
Tips for achieving professional-looking 3D nail art include:
- Starting with simple designs.
- Using quality products.
- Practicing precision.
- Experimenting with colors and textures.
- Properly caring for tools.
- Staying inspired by following trends and tutorials.
10. What are some inspirational ideas for 3D nail art designs?
Inspirational ideas for 3D nail art designs include:
- Enchanted garden with flowers and butterflies.
- Glamorous night out with rhinestones and metallic studs.
- Ocean fantasy with shells and starfish.
- Vintage elegance with lace patterns and pearls.
- Futuristic geometrics with bold shapes and metallic colors.
11. What are the future trends in 3D nail art?
Future trends in 3D nail art include the use of advanced materials like bio-gels, the integration of 3D printing technology, interactive designs with heat-sensitive polishes and LED lights, and augmented reality apps for visualizing designs.
12. How can I maintain my 3D nail art?
To maintain 3D nail art:
- Avoid using nails as tools.
- Wear gloves when doing household chores.
- Use cuticle oil regularly to keep nails hydrated.
- Schedule regular touch-ups with a professional if needed.
13. Can 3D nail art be combined with other nail art techniques?
Yes, 3D nail art can be combined with other techniques like hand-painting, gradient designs, and glitter applications to create unique and personalized looks.
14. Where can I learn more about 3D nail art?
You can learn more about 3D nail art through online tutorials, nail art blogs, social media accounts of nail artists, and professional nail art courses.
15. Is 3D nail art suitable for everyday wear?
While 3D nail art can be worn daily, intricate and heavily embellished designs may be better suited for special occasions. For everyday wear, consider minimalist 3D designs that are more practical and durable.
